What Are Lead Magnets?
A Lead Magnet serves to attract leads who may be interested in your products and services. It's an incentive offered to people in your market to encourage them to leave you their details so you can then follow up with them.
With regular follow up and by keeping in contact with them, these leads convert into direct sales revenue.
So what can you offer to attract potential buyers?
The right incentive—or Lead Magnet—can make a huge difference to the number of leads you attract. Your business needs at least one Lead Magnet. It can then work 24/7 to encourage potential customers to leave you their details.

What Can You Offer?
There's an almost infinite variety of Lead Magnets you can offer to potential buyers in your market.
You can start by simply offering to send them regular updates, for example, new content and other relevant information.
Or offer a suitable resource of interest and value to those in your market. For example, it might be something to download or maybe a video to watch.
Consider who your ideal customer is and what their interests, needs and desires are. What can you offer that helps attract them to you? The Lead Magnet itself can also illustrate your expertise and help build their trust in you.
You may already have something suitable. If not, consider allocating the resources to develop a suitable Lead Magnet for your market.
A single Lead Magnet can attract thousands—if not tens of thousands—of new leads.
TIP: Continually split test different Lead Magnets. One Lead Magnet will often far outperform another.
Lead Magnet Ideas
Here are a few ideas for different types of Lead Magnet you can use . . .
- Guide/report
- Videos
- Free shipping
- Checklist
- Free trial
- Cheatsheet
- Toolkit or resource list
- Software
- Software
- Discount
- Survey
- Swipe file
Using Lead Magnets in optinopoli™
Lead Magnets are an integral part of optinopoli™'s lead capture functionality. Each Lead Magnet can be offered via multiple campaigns on your own website and via links on third-party websites, providing opportunities to attract leads in different ways.
For example, you might have a relevant cheatsheet to offer as a Lead Magnet to visitors to a particular blog post (also known as a content upgrade).
You would add the Lead Magnet to your optinopoli™ account as described below, and create a campaign to offer the Lead Magnet to visitors to your blog post.
The blog post might then be repurposed into say a Slideshare presentation, YouTube video, post on Medium or guest post on another blog. You would use another campaign to offer the same Lead Magnet to visitors to this content. In addition, you could offer the same Lead Magnet directly to social media followers.
How to Create Lead Magnets in optinopoli™
As described below, to create a Lead Magnet in optinopoli™, you:
- Add the default copy and optional image to be used for related campaigns (edit as required per campaign)
- Integrate with your CRM to automatically add the details of new leads, and/or POST the data via webhook.
Setting up Lead Magnets in optinopoli™ makes creating one or more related campaigns that offer the Lead Magnet to potential prospects quick and easy.
Run as many campaigns on your site for the same Lead Magnet as you want. Once a visitor has converted into a lead, they will no longer see the campaigns (unless you choose otherwise).
Instead, run follow-on Smart Campaign(s) to personally engage new leads, build your relationship, and convert them into buyers.
Here's how to set up a new Lead Magnet, step by step:

01
Click to add a new Lead Magnet
Click Lead Magnets from the sidebar and then the Add New Lead Magnet button.
02
Enter general details
Enter the name of the Lead Magnet, an optional description, and ensure the selected domain is correct.


03
Select Group (optional)
Optionally add and/or select a Lead Magnet Group. This allows you to group Lead Magnets together for use with Smart Campaigns.
This means you can potentially run follow-on campaigns for a visitor once they have signed up for a Lead Magnet within a particular Group.
For example, you might want to group all content upgrade Lead Magnets together as a type of 'entry level' lead capture offer.
Once a lead has signed up for one such offer, you can use Smart Campaign(s) to offer follow-on opportunities that build your relationship and convert the lead into a buyer.
For example, you might offer a time-sensitive discount, a webinar sales presentation, a whitepaper, a free consultation, and so on.
04
Provide access info (optional)
If your Lead Magnet is distributed via a download or a web page, turn on the Provide via download or web page? option.
Select the relevant option, and either upload the file or provide the link to the web page accordingly.
This means you can now optionally provide new leads with immediate access to the Lead Magnet via the Success options when creating related campaigns.
It also means you can efficiently manage multiple Lead Magnets from a single location without needing developer support, and where applicable enable leads to download the Lead Magnet from our high-performance CDN.

05
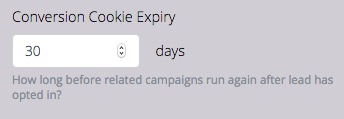
Set conversion cookie expiry
Once a lead has been captured, optinopoli™ automatically stops running campaigns featuring the same Lead Magnet to the same visitor, for the number of days set in the Conversion Cookie Expiry setting*.
However, for inline Widgets, in order to avoid page layout issues in some cases, you can choose to continue showing the Widget after lead capture via the Show Widget on reload setting.*
Set the expiry date for anything up to 10 years (3650 days) after opt-in.
* The exception is where you have follow-on Smart Campaign(s) that are set to run after lead has been captured. In this case, the Smart Campaign(s) will run in place of the original campaign, regardless of the cookie expiry setting or setting on the Widget.
06
Create default copy
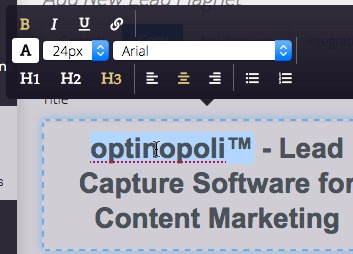
Click the Copy tab. Create the default copy for related campaigns (this can be edited as required for each campaign).
Highlight sections of text to see rich text editing options. For example, change alignment, add/remove bold and italics, change the font family, size, color, and more.
07
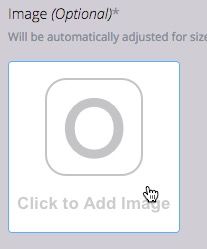
Set a default image (optional)
Set a default image for the Lead Magnet, to be used for related campaigns. As with the copy, this can be edited as required for each campaign.
The image might for example be a 3D cover for a downloadable report, or a thumbnail of a video.
08
Set notifications
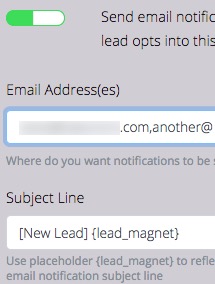
Click the Notifications tab. Choose to send email notification(s) when a new lead is captured via a related campaign.
Enter multiple email addresses, comma separated. Notifications are sent individually to each email address listed, maintaining recipient privacy.
Edit the subject line as required. The {lead_magnet} placeholder is swapped for the Lead Magnet's name when the email is sent.
09
Add integrations
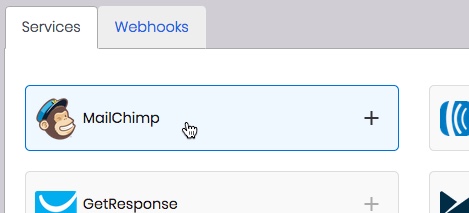
Click the Integrations tab. Choose to automatically add the data for new leads to selected integrations.
Most major CRM and autoresponder services are supported including MailChimp, Infusionsoft and Aweber. Don't see yours? Contact us to check whether we support it and can enable it within your account.
To start sending leads, click the relevant button and follow the instructions provided.
Webhooks are also supported. This allows you to push POST notifications that contain the lead data to any URL you wish.
10
Save Lead Magnet
Finally, click the button to save the Lead Magnet.
You can also save partial information at any point via the Save Draft button. Note that draft Lead Magnets will not be available for use with campaigns until Add Lead Magnet is clicked.
Once added, you can create one or more campaigns to start offering the Lead Magnet to potential prospects and start capturing leads.

Need Further Help?
Contact us at support@optinopoli.com